Showing posts with label acrylic. Show all posts

Thursday, March 25, 2010

Art Deco Desk Clocks

In Architecture of Objects I just finished up with a quick clock project. I really enjoyed the project, quick but the clock is such a classic design brief. I had sketched for a few days and because of time constraints started to build my original design the day before it was due. Of course, in making physical models, all the issues come out and I scrapped the idea at about 6pm and started sketching again.

My inspiration for this clock was actually from the video game, BioShock. I had recently being playing the game and was inspired by the immersive art deco environment and decided to pursue a simple clock which would try to bring the styling of the 1920's into modern materials.
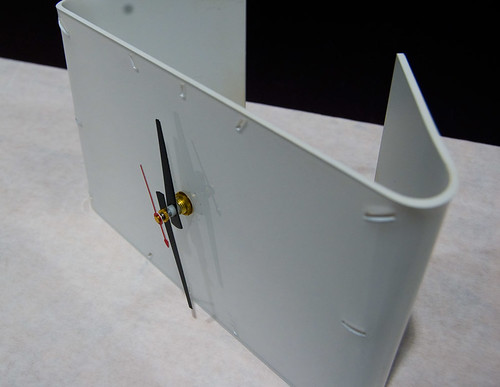
I decided on using clear acrylic which would be laser cut, painted and then heat bent into shape. It was quick, easy and repeatable, which was good since the clocks were due the next morning.

I have three designs in three colors (gloss white, gloss black and matte black).


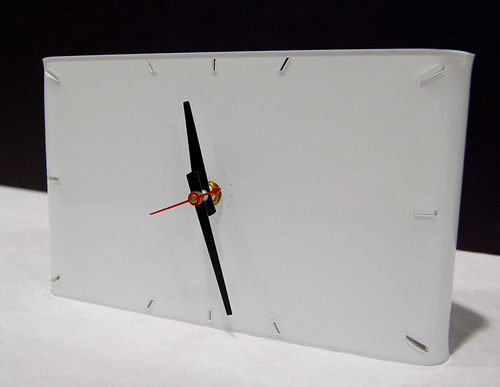
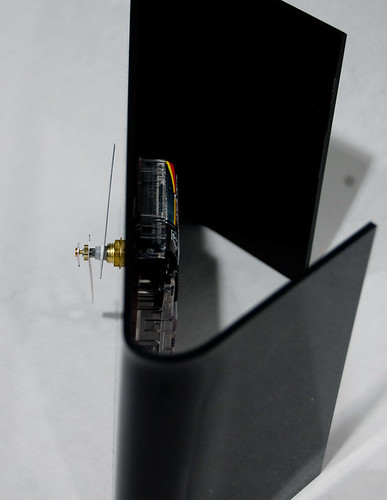
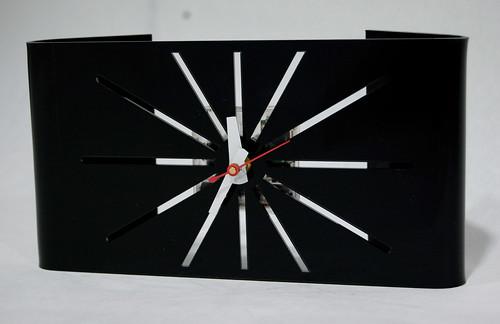
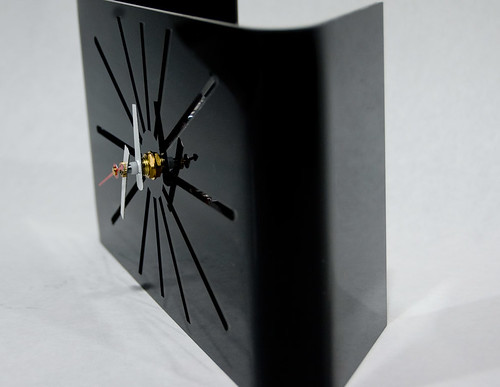
My favorite of the three is the white clock with the hour markers on the perimeter of the face. Currently, I'm experimenting with the same design in black. The sunburst design, while calling up the art deco influence, exposes the mechanics behind the clock. I'm trying different things with the design to make the mechanics less visible including moving the sunburst starting point out and making the cutouts thinner. We'll see.

The clocks went over well in crit, Shaun felt I had succeeded in styling my clocks after the 1920's and art deco and actually said he would like the white design on his mantle. I consider this to be the ultimate compliment.

Again, for this class I am trying to make products that could be mass produced. With a jig to get the bends correct every time this design would be quite easy to produce on large quantities. I've actually been kicking around the idea of making some more of these and selling them on Esty. We'll see what comes out of it.

Thanks for reading.

Monday, December 14, 2009

It's Over and Done With

It's sort of bittersweet, but Smart Surfaces is, for all intents and purposes, over. It's sort of anti-climatic actually. A semesters of some of the hardest work I've ever done and then it's over. Maybe for me it's just what I feel after any big project but heightened since I missed the final presentation because of a death in my family. Talk about climactic in all the wrong ways.

Anyways, our project is

The iWall Modular Light-Filtration System

The wall you see here is a modular, scalable, self-adjusting multi-aperture window, designed to optimize light flow into a room by manipulating the position of rotating wood panels. You could call it an 'automatic venetian blind', as that is the gist of the purpose. The system consists of 30 individual modules, with one panel per module, which allow a variable amount of light to pass through. The structural elements are built modularly, but circuitry elements - such as wiring - are set up in a non-modular fashion. Individual module apertures open and close in reaction to the intensity of the light that passes through the wall as detected by light-dependent resistors (LDRs), seen on the projection side, holding a relatively constant light level on the ‘interior’ of the wall at all times - this gives 'heliotropic' and 'smart' characteristics to the wall - 'surface', fitting it into the premise of the SmartSurfaces course. The actual actuation is by a grid of servos powered externally and controlled through inputs from an Arduino Mega and the LDRs. The materials used in the assembly of the individual modules were 3/16" cast acrylic cut by laser and 3/16" 6061 aluminum sheet cut by water jet.

My group presenting our passive lighting system.


The back of the modular wall.


The view through a module to the light patterns created behind the wall.


Each module had it's own servo turning the panels. Each panel was veneered with a curly maple veneer on the back and a thin layer of white polystyrene on the front. The modules are held to each other by 4 bolts per unit.

I am so incredibly happy and proud with how our project turned out. It's one of my favorite pieces I've ever been a part of. It was an incredible amount of work, and an incredible amount of time, and quite a bit of money (Grants are awesome!), and something that I can't wait to show off in my portfolio.

I really enjoyed working with my team. Neil (Engineering) basically coded and figured out how to make the arduino do what we wanted it to do. Big props to Neil. Michael (Engineering) did a little of everything really and was a big help assembling, but single handedly tackled our big final paper and kept the team on budget. Breanna (Architecture) handled the renderings, worked on the CAD design and was part of the assembly team. Taylor (Design) was Mr. Building and worked on CAD design and single handedly made the panels. Josiah (Architecture) worked primarily on assembly and the build team and made a big contribution on the laser cutting and water jet cutting of the raw acrylic and aluminum. I (Design) spent my time water jet cutting the aluminum, laser cutting a small fortune in acrylic, and assembling modules.
I really feel like we had a dream team and I would work with any person in my group again in a heart beat. I'll honestly miss seeing them almost everyday. Perhaps before next semester starts up my group would like to meet for a beer at Ashley's Pub?

I'd also like to thank the professors that ran this course, John Marshall (Art & Design), Max Shtein (Materials Science Engineering) and Karl Daubman (Architecture) all did a hell of job. Even though we sometimes felt like guinea pigs as students, the course was a great one and one that defines the Michigan difference. This was an opportunity that would never have been available to me at any other art & design school. A heartfelt thanks to all the professors.

Thanks for reading.

Friday, January 30, 2009

826 Michigan Window Robot


I can not believe I never posted the finished 826 Michigan robot! I just realized that my header image here at A plus D equals Me and my welcome image at my website, umich.edu/~petemh, both use the robot and I've never really shown him here! So, here goes!

Well it's pretty simple all together actually, the robot was made as an incandescent window dressing model to attract attention night and day to the 826 Michigan robot storefront. 826 Michigan is a "non-profit organization dedicated to supporting students ages 6 to 18 with their creative and expository writing skills, and to helping teachers inspire their students to write." After tutoring there a few times for CFC II, I did the robot as way to give back.

Why a robot? Well the original 826 tutoring location in San Fransisco had a clause in it's building lease that they needed to have a store front, so they put up a pirate supply store, kinda as a joke. Except now the store is very profitable and helps to drive the free tutoring programs for the kids. It is now a tradition for all 826 locations around the nation to have a store front, Michigan chose a robot supply store and called it Liberty Street Robot Supply & Repair. How awesome is that for kids, get tutoring at the robot store! If you want to visit, it's here in Ann Arbor at 115 East Liberty Street a few blocks away from campus towards Main St.


826 Michigan Storefront


The robot himself (if it was a real robot, it would be programed to be a guy I've decided, a guy robot who waves hi!), was designed in Adobe Illustrator, and made out of 1/4" amber acrylic which was laser cut and then stacked and fastened together. His eyes light up when he is plugged in and his whole head glows! Which, of course, is awesome!


Hope you like him, it's one of my favorite things I've done at Michigan. I mean a light up robot? Please.

Thanks for reading!
Related Posts with Thumbnails