Showing posts with label Smart Surfaces. Show all posts

Wednesday, January 6, 2010

Moving Forward

Well, 1st day of the new semester and I'm already 2/3 of the way through my day.

I just wanted to look back at last semester briefly before I move on.I worked my butt off last semester and it really shows with my grades.
More w/ Less, A. Smart Surfaces, A. Furniture, A+.
That puts me on the Deans list for the first time, which was a small goal of mine when I started at Michigan. I'm quite proud.

Looking forward to Winter '10, I've got some interesting work ahead.

First and foremost, Architecture of Objects. I'm really excited about this class.

This course focuses on the design and construction of every day objects including lighting, furniture, and tabletop objects. A strong emphasis is placed on the relationships among the materials used in the designs and the details employed in bringing those materials together to create functional objects. Several specific manufacturing processes will be explored. This is a rigorous course and should only be considered by those truly interested in the opportunity to create resolved, full-scale designs. Work from previous iterations of this course has been featured in Interiors and Metropolis magazines and has been exhibited for a number of years a NEOCON in Chicago.


Then Contemporary Photography. Also excited about this, I really enjoy taking pictures.

A first course for students who have not completed a college level photo course. Students generate their own work in response to class discussions and motion picture viewings, which focus on still photography and the roles of photographers in society. Students must have their own adjustable digital camera, a laptop computer, and Adobe CS3 for photo editing.


Then an architecture course, CAD Fundamentals. This is less exciting but I want to go from intermediate Rhino user to advanced Rhino user.

This introductory course investigates architectural drawing using digital design tools. Lectures and readings focus on digital drawing as a generative and representational device, while exercises and laboratory sessions help students achieve a basic competency with drawing and image manipulation software. Projective and translational drawing exercises are used as a means to explore fundamental concepts shared by many digital software interfaces. Emphasis is placed on exploiting the unique capabilities presented by digital design tools, while developing a critical understanding the inherent biases and limitations of any software.

I'm also taking a history course on the early years and formation of the Eastern Orthodox Christian church. I really enjoy history courses and am trying to learn more of the history behind my religion, beyond what you can find in the Bible.

So, here we go!

Thanks for reading!

Tuesday, December 15, 2009

Smart Surfaces Course Progression

I was just thinking about how much each project has progressed us as Smart Surfacers (it's a word now!). We started the semester with this, basically throwing sand around.


Then we progressed into heliotropism and easily tripled the complexity of our problems. We also made smartish objects. This could follow the sun (or a flashlight as it may be).

Our sun tracker.

After that we stayed at basically the same level and created a field of solar trackers that moved in unison.


Our solar tracker in action.

We then moved into a two week project and we created the light box, it was powered through solar panels and a side lit up when you walked by it. The idea was to create a field of them to walk through. This was the most frustrating two weeks I think I've ever had. (Team problems for a while)


Then of course, we moved on to the iWall (I still hate that name), which I'm really really proud of.


Basically, what I'm getting at is look how far we've come! From throwing sand to an aluminum and acrylic self adjusting passive lighting modular wall system. Not bad.

Thanks for reading.

Monday, December 14, 2009

It's Over and Done With

It's sort of bittersweet, but Smart Surfaces is, for all intents and purposes, over. It's sort of anti-climatic actually. A semesters of some of the hardest work I've ever done and then it's over. Maybe for me it's just what I feel after any big project but heightened since I missed the final presentation because of a death in my family. Talk about climactic in all the wrong ways.

Anyways, our project is

The iWall Modular Light-Filtration System

The wall you see here is a modular, scalable, self-adjusting multi-aperture window, designed to optimize light flow into a room by manipulating the position of rotating wood panels. You could call it an 'automatic venetian blind', as that is the gist of the purpose. The system consists of 30 individual modules, with one panel per module, which allow a variable amount of light to pass through. The structural elements are built modularly, but circuitry elements - such as wiring - are set up in a non-modular fashion. Individual module apertures open and close in reaction to the intensity of the light that passes through the wall as detected by light-dependent resistors (LDRs), seen on the projection side, holding a relatively constant light level on the ‘interior’ of the wall at all times - this gives 'heliotropic' and 'smart' characteristics to the wall - 'surface', fitting it into the premise of the SmartSurfaces course. The actual actuation is by a grid of servos powered externally and controlled through inputs from an Arduino Mega and the LDRs. The materials used in the assembly of the individual modules were 3/16" cast acrylic cut by laser and 3/16" 6061 aluminum sheet cut by water jet.

My group presenting our passive lighting system.


The back of the modular wall.


The view through a module to the light patterns created behind the wall.


Each module had it's own servo turning the panels. Each panel was veneered with a curly maple veneer on the back and a thin layer of white polystyrene on the front. The modules are held to each other by 4 bolts per unit.

I am so incredibly happy and proud with how our project turned out. It's one of my favorite pieces I've ever been a part of. It was an incredible amount of work, and an incredible amount of time, and quite a bit of money (Grants are awesome!), and something that I can't wait to show off in my portfolio.

I really enjoyed working with my team. Neil (Engineering) basically coded and figured out how to make the arduino do what we wanted it to do. Big props to Neil. Michael (Engineering) did a little of everything really and was a big help assembling, but single handedly tackled our big final paper and kept the team on budget. Breanna (Architecture) handled the renderings, worked on the CAD design and was part of the assembly team. Taylor (Design) was Mr. Building and worked on CAD design and single handedly made the panels. Josiah (Architecture) worked primarily on assembly and the build team and made a big contribution on the laser cutting and water jet cutting of the raw acrylic and aluminum. I (Design) spent my time water jet cutting the aluminum, laser cutting a small fortune in acrylic, and assembling modules.
I really feel like we had a dream team and I would work with any person in my group again in a heart beat. I'll honestly miss seeing them almost everyday. Perhaps before next semester starts up my group would like to meet for a beer at Ashley's Pub?

I'd also like to thank the professors that ran this course, John Marshall (Art & Design), Max Shtein (Materials Science Engineering) and Karl Daubman (Architecture) all did a hell of job. Even though we sometimes felt like guinea pigs as students, the course was a great one and one that defines the Michigan difference. This was an opportunity that would never have been available to me at any other art & design school. A heartfelt thanks to all the professors.

Thanks for reading.

Thursday, December 10, 2009

1 day 'till due. No pressure. It's only 3 grand.

Yep, it's all due tomorrow (Friday) for Smart Surfaces baby! A few photos from module building over the past two nights.

Josiah, Breana, and I working Tuesday night glueing modules.

A module without the light controlling panel in the middle.

The army of half modules, all glued up and waiting for the plywood panels.

Best of luck to my group tomorrow night and Friday, I'll be gone because of a death in the family. They are going to kick ass.

Thanks for reading!

Friday, December 4, 2009

IT FITS!

The planning has payed off! The aluminum and the acrylic fit together! If they didn't fit perfectly our Smart Surfaces group was out almost $1,000 in aluminum and acrylic. Luckily, we are not screwed!

They fit, friction fit even!

Water Jet Cutting!

We started cutting our aluminum triangle faces for Smart Surfaces out of our large (4'x8') sheet of 3/16th aluminum yesterday. I say started because the entire cut is going to take 3 hours and use 180 lbs of the abrasive material and we ran out of abrasive material. Sooo, we get to finish it up on Monday.

Either way, the water jet cutter is one of the most useful machines in the Digital Fab Lab in my opinion. The quality of the cuts are nearly finished quality and it does a beautiful job of intricate cuts. Also, the Fab Lab guys are great, they know what they are doing and are fun to work with. Highly recommended.

The aluminum sheet in the machine, pre cutting.

Cutting a piece out. It's quite a machine to watch, lots of high pressure water, bubbles, and noise!

A cut piece. Just a little sanding on the edges and it's ready to go into a wall module.

At this time we are also laser cutting out the acrylic sections of the module, we have 3 4'x8' sheets of acrylic, so lots and lots of laser cutting ahead of us!

Thanks for reading!

Monday, November 30, 2009

Hey Look Ma! A Module!

The prototype of our module, of which for the final there will be 36 of them, stacked.


We're working on small final revisions before our final order for materials (acrylic & aluminum). This upcoming week and weekend will be a whirlwind of water jet cutting aluminum, laser cutting acrylic, glueing, veneering and all manner of little problems that we are trying to anticipate but are sure to pop up.

11 days until the final project is due. Gulp.

Testing 1,2,3...can anybody hear me?

We spent last weeks Smart Surfaces class period testing our LDRs (light sensitive things) and getting a reading of how sensitive they are and generating ideas on how to arrange our modules in the final iteration. We came up with some cool graphs, which I won't take time to explain since I doubt many are interested in what exactly they told us, but none the less they look nice!


This was our super scientific controlled experiment, stray foam core and cardboard. Funny thing was 2 designers and 1 architect set up the experiment to gather data for the engineers (I scoff at your scientific method!)


Thanks for reading.

Thursday, November 5, 2009

Solar Surface Sketch Model

Yea for group work! After Josiah, Mike, Neil and I made the structure yesterday, Brieana and Taylor coded it to work this afternoon! It sounds like the coding was easy, but I'd rather build with czech toys than code any day of the week!


Thanks for reading!

Wednesday, November 4, 2009

Building What We Can

We'll we're in final groups of course now. I really like my group, we work well together and all get along which is even more appreciated after the last group!

Smart Surfaces Team One is (since I've not posted on it before)

Josiah - Architect
Brieana - Architect
Michael - Materials Science
Neil - Materials Science
Taylor - Design

I'm excited to work with all of them.

Today we got to work on prototyping something to show roughly what we want to do with our project. It's good to make something, it's what I as a design student love to do. Book work sucks, working with your hands is the best.

It's also nice to have a doable project at this point. We've redefined the project twice now. First idea was, well three ideas, which we ran by the class (no one liked any of them) and we moved on in a different direction. (The first ideas were things like making a solar stadium or retrofiting Michigan Stadium with solar panel bleachers). We then moved onto solar umbrellas and really developed the idea quite far and had a great presentation that really went over why these solar umbrellas were awesome, what they would do, why they were needed and such.

The presentation went over great. Then why do you ask did we redefine the project a second time?

Eugene Shteyn. (The guy sitting in the chair in the picture above)

This guy single handedly saved our project by making us really think about it. Eugene is the Director of Intellectual Property and Standards at HP and teaches as Stanford. He went through finding high quality problems that are implementable. We also went through reverse brainstorming, which is basically finding problems with solutions not solutions to problems. We had to think up 70 real problems with our project. It was surprisingly easy and I think it really overwhelmed all of us how flawed our project was.

70 problems with the solar umbrellas. That's me looking back!

But after working on it for a week, I think we've really figured out how to simplify our project and make it work for a gallery presentation. Yep, gallery presentation. The final projects must fit in a 8'x8'x8' space.
Also, this new project is easier to build.

Unfortunately I'm not sure how best to describe our final project now, but it's going to be great and basically still deal with shade but in a simplified and much cooler interactive form. Basically there will be a surface of solar panels above you in some public place and when you move under them they flip over. So as you walk around under it, the flipping follows you around! Cool!
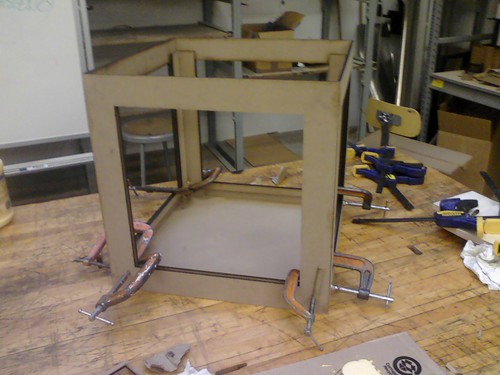
So picture of what we build today will have so suffice until I borrow/pirate a better description from one of my groups members blog!

As part of the class we've got these random Check metal toys. Kind of like an erector set, but cooler because it's Euro! We had 'play time' and built with the toys today. It was great. This post is titled Building What We Can because we are waiting on our materials from our $500 dollar prototyping budget and we really wanted to have something to show for Friday.


Those are the 'solar panels' on the axis. It was surprisingly fun, best group meeting yet, because we got to build stuff with toys! Great!

Sunday, October 25, 2009

Week 4 and the Light Box in Smart Surfaces

Well, it's done.

Pretty much, we created a light box that is motion activated when someone walks by. Our group envisioned this project as an installation piece where there would be large scale deployment of these cubes in a large public area (like U of M's Diag). As people move between the cubes in their daily lives the light would follow them through the cubes. Yep, we made an art piece that makes the sun an ancillary part, it's got solar panels on top to charge it during the day.

This was a trying project, and I'm honestly very glad we are done with it. Our team didn't always work well together and I even made the front page of the Smart Surfaces website ranting about it last post. Opps/Nice.

We had Julian Bleecker from the Near Future Laboratory come this week and talk to us about Undisciplinaryism. He commented on each of our projects, but unfortunately seemed to have little to say about our groups projects.

Building the box.


Setting up the wires.


The windows are acyclic that slide down into slots in the box and are then lit by a row of colored LED's from the bottom. Patterns were laser scored into the panes to provide opportunities to light to catch.

(From rootoftwo (John Marhall) on Flickr)

The blue LED's worked very well, and it made the bubbles pane of acrylic look great.

We're onto our final groups and final projects now. I like my group, everyone seems good so far! We presented ideas for our projects today in class and it seemed from all the presentations that the professors (John Marshall, Max Shtein, Karl Daubman) were not extremely excited or happy with our ideas. I'm tempted to ask what they were really hoping for or thinking we might come up. They honestly seemed disappointed. We'll see.

Thanks for reading!

Tuesday, October 13, 2009

Installation Project

So, we're almost done with project 4. We've had two weeks on this project and it's is incredibly open ended, well kinda. The project is,

This exercise prompts you to propose, develop, deconstruct and implement an idea based on the principles of an interactive, heliotropic smartsurface. The smartsurface concept should constitute a set of functionalities that otherwise exist in 3-dimensional space, collapsed into an ostensibly 2-dimensional space, thereby gaining additional functionality and/or appeal.

The example in class of a ostensibly 2-d surface that is really 3-d was the iPhone. Lots of different layers go into the screen of that device, but they are squished together to create what it for most intents, 2-d.

Well, our group, and and other groups I believe, have taken this project and pretty much run with it. Our group is making an installation piece. Basically, there are a field of human size cubes in an open area. The cubes are lined with acrylic and LED's that are turned on by a heat sensitive motion sensor. As you move by the LEDs light up and fade as you move away. As you move through the field the trail of light follows you. The interaction with the lights changes as other people move through the field with you.

So basically, we stuffed the iPhone and made an art piece. Sweet!

I'm sorry, I don't have a single picture to share currently, my little point and shoot camera has basically gone from being on the fritz to officially freaking out and not working. Since I don't carry my big DSLR around with me, I don't have any pictures...yet.

So stay tuned! Pictures to follow!

In all honesty, it's been a very frustrating and trying one and a half weeks with the current group and I'll be happy to be done with this project, we don't seem to work extremely well together and we have some stubborn group members and we have been butting heads. It's been interesting.

Thanks for reading!

Wednesday, October 7, 2009

Bendable LEDs Looking For an Application? Now This Sounds Like A Problem For Smart Surfaces!


"LED manufacturer Bivar's new, flexible Light Pipe System, a bendable LED tube ideal "for outdoor and rugged applications, which require greater brightness and light transfer capacity, sturdy design and more flexibility."

Hmm. I like this. I wonder if my group can get our hands on some for our project...

Wednesday, September 30, 2009

Arduino Heliotropic Code

This is the code from our second project, the light source finder. Our code was mostly derived from the Arduino meets Processing project and was pretty much figured out by Michael Mathieu, a senior in MSE.

Just a note for anyone who's never looked at code before, anything inside of or after / is a comment to tell the human reader what it does.

/*
* ap_LDRAiming
*
* Reads an analog input from the input pin and sends the value
* followed by a line break over the serial port.
*
* This file is part of the Arduino meets Processing Project:
* For more information visit http://www.arduino.cc.
*
* copyleft 2005 by Melvin Ochsmann for Malm� University
*
*/
#include
Servo myServo;

// variables for input pin and control LED
int PhotoA = 3;
int PhotoB = 4;
int PhotoC = 5;
int LEDpin = 13;
int pos = 0;

// variable to store the value
int valueA = 0;
int valueB = 0;
int valueC = 0;
// a threshold to decide when the LED turns on
int threshold = 750;
void setup(){

// declaration of pin modes
pinMode(PhotoA, INPUT);
pinMode(PhotoB, INPUT);
pinMode(PhotoC, INPUT);
pinMode(LEDpin, OUTPUT);
myServo.attach(9);
// begin sending over serial port
Serial.begin(9600);
}

void loop(){
// read the value on analog input
valueA = analogRead(PhotoA);
valueB = analogRead(PhotoB);
valueC = analogRead(PhotoC);

// if value greater than threshold turn on LED
if (valueA <>

// print out value over the serial port
Serial.print(valueA);
Serial.print(",");
Serial.print(valueB);
Serial.print(",");
Serial.print(valueC);
// and a signal that serves as seperator between two values
Serial.print(";");
// Checks if right is greater than left, if so move to right.

if (valueB > (valueC +20))
// +20 is the deadzone, so it wont jiggle back and forth.
{
if (179 > pos)
pos++;
myServo.write(pos);
}

// Checks if left is greater than right, if so move to left.
if (valueC > (valueB +20))
// +20 is the deadzone, so it wont jiggle back and forth.
{
if (pos > 1)
pos -= 1;
myServo.write(pos);
}

// wait for a bit to not overload the port
delay(10);
}

The code includes a serial input that we used to judge whether or not our solar detection was working properly in a numerical sense. By slowing the program down to a delay of 250, we were able to tweak the code in order to ensure that the readings were proper, and that we could utilize the changes in direction properly.

The biggest issue for our group was ambient lighting, which we were able to counteract with a shade of sorts Allison and I made while in design, but in final display we could not, because of the amount of ambient light in the presentation area rendered our shade useless. We set our thresholds slightly too high for the situation that we were in, but it worked amicably for the purpose of presentation.

Thanks for reading.

Smart Surfaces and Heliotropic Systems

A quick update on week 2-3. We've moved along with arduino learning how to program it using photocells and servo motors to follow a light source, which is quite cool actually, I'm still at the "gee-whiz! It moves!" stage of physical computing. I really think they should teach physical computing in Physics 240 (electromagnetic physics and includes circuits) and Engin 101 (programing). Learning how to manipulate code to actually have a physical result is much more engaging than the same old compile, run, debug, compile, run, "hello world!'.

Anyway, all of this is leading into heliotropic systems (following the sun, like sunflowers).

Our light source tracker!

The bread board and all the wires inside the base.

We had two servo motors moving our contraption. One on the horizontal (x-axis) making it rotate and follow side to side and the other on the vertical (y-axis) following up and down.

For a quick video of it mostly working (too much ambient light, we set our light threshold a bit to high). Check out my group member, Damien's, flickr site here. Her blog can be found here.
Related Posts with Thumbnails