Thursday, February 4, 2010

Ikabana Flower Arrangement

Last week in Architecture of Objects, Shaun had a master of the Japanese art of flower arrangement, Ikabana, come in to talk to us and give a demonstration on Ikabana. Sort of a crash course into a delicate, purposeful art form if there can be such a thing.

I feel terrible that I cannot remember the woman's name who came to talk to us, but I do remember that she owns the Chelsea Flower Shop and is from the modern school of Ikabana. What is the modern school? I as a non-Japanese person would have a hard time telling you what exactly that means. She couldn't even really explain it to us.

Manipulating grasses by hand. She was amazing working with the plant material, very purposeful with force, never overly stressing the plant.


My favorite arrangement of the six she made. The arrangements were put in the TCAUP Architecture office and the Art & Design office.


It was really quite enjoyable, I was a bit dubious before the class that we were doing flower arrangement, but I'm glad to say it was much more interesting than I had anticipated.

Our assignment now is to make Ikabana vases and flower arrangements for them. We are of course limited to certain materials, but for a Shaun Jackson project, it's really quite a wide palate. We could use metals, woods, stone, cement, rubber, or plastic. Our designs have to incorporate at least two of the materials and use both in an non-token elemental way.

This should be an interesting project over the next few weeks, I think the biggest challenge for me will be making sure to think of the organic plant material as a primary part of the design and not a secondary piece.

Thanks for reading!

Monday, February 1, 2010

Scavenger Hunt Photos

Our first assignment for Contemporary Photography was a simple scavenger hunt type assignment. Basically, since the course is introish in nature and many people don't know their cameras very well, the assignment gave us words and we went out and took pictures of how they inspired us.

I'm only going to present the images I printed for crit or ones that I particularly like.

Consciousness
A portrait of my good friend Chris.

Invisible
This is Lawrence, a homeless man in Ann Arbor. We had a conversation over coffee on a bitterly cold Friday in Ann Arbor. Needless to say, he has a hard life.

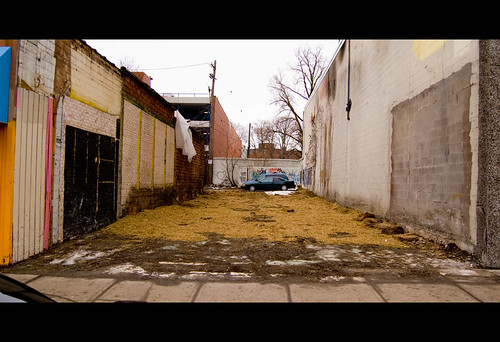
Landscape Interrupted
The former location of the old Pinball Pete's on South U. in Ann Arbor. It was destroyed by a fire in fall 2009.

Ritual
Biggby coffee on Liberty St. in Ann Arbor.

Message to the World
An outreach guy for a local church in Ann Arbor on Michigan's Central Campus Diag. I don't think he was amused with me.

Longing
Two patrons of Potbelly's on State and Liberty in the 2nd story windows.

I very much enjoyed having a good reason for just walking around A2 taking pictures for once, it's nice to get credit for doing what I do for fun anyway!

For this assignment I really tried to stay in the spirt of a scavenger hunt and not build scenes to shoot, but find them on my own. It was a challenge and I think for our next assignment I'll defiantly be doing more posed or staged images but I really enjoyed working that way for this assignment.

Thanks for reading.

Sunday, January 17, 2010

Wire and Paper Lamps

Well headlong in to the new semester!

It's always exciting to start all these new classes, but I'm particularly excited about Architecture of Objects (as I think I've mentioned about 3 times before).

We've started out with a quick project making lamps from paper and wire. As is typical for a starter Shaun Jackson project, the materials are limited, but that is just fine with me. To many options and the whole thing gets clouded real quick.

So, we are alloted,
- 6 feet of wire up to 3/32" diameter
- 2 square feet of translucent material (paper)
- 1 compact florescent bulb (to give it a tinge of sustainability!)
- 8' lamp cord
- can be a table, wall sconce, or hanging lamp

So from there, I sketched and made 7 unique 1/4" scale sketch models out of some thin wire and tracing paper. All I was really trying to do was come up with some sort of a form to chase and my model making wasn't really structured. I had sketched some ideas but found it easier to sketch new ideas as models instead of 2-d drawings.


After a desk crit with Shaun, I decided to pursue two particular designs and develop the idea at 1/2" scale paying particular attention to how the light would attach, how it would attach to the wall (for the wall sconce), how it would assemble at full scale, etc.

I picked my geometric table lamp and the simple wall sconce screen. I picked the two of them because they were the ones I felt most connected and interested in and also because Shaun like them. So I, understanding that he knew way more about this than me, took his suggestion.

The only thing I changed on the table lamp was removing the center pillar as it cast a very obvious shadow when the light was installed. This resulted in a not quite as crisp front edge unfortunately.

I developed the simple screen because of it's complete simplicity, which I really liked. I only changed the proportions of the screen from a square to a 8"x10" rectangle as a square on the wall seemed awkward.

After a brief crit with Shaun on Thursday, I've decided to pursue the simple wall screen for my full scale lamp. I'm working on it currently, aiming to be done for presentation on Tuesday morning. Once done, I'll post process pictures and the final lamp.

Thanks for reading!

Wednesday, January 6, 2010

Moving Forward

Well, 1st day of the new semester and I'm already 2/3 of the way through my day.

I just wanted to look back at last semester briefly before I move on.I worked my butt off last semester and it really shows with my grades.
More w/ Less, A. Smart Surfaces, A. Furniture, A+.
That puts me on the Deans list for the first time, which was a small goal of mine when I started at Michigan. I'm quite proud.

Looking forward to Winter '10, I've got some interesting work ahead.

First and foremost, Architecture of Objects. I'm really excited about this class.

This course focuses on the design and construction of every day objects including lighting, furniture, and tabletop objects. A strong emphasis is placed on the relationships among the materials used in the designs and the details employed in bringing those materials together to create functional objects. Several specific manufacturing processes will be explored. This is a rigorous course and should only be considered by those truly interested in the opportunity to create resolved, full-scale designs. Work from previous iterations of this course has been featured in Interiors and Metropolis magazines and has been exhibited for a number of years a NEOCON in Chicago.


Then Contemporary Photography. Also excited about this, I really enjoy taking pictures.

A first course for students who have not completed a college level photo course. Students generate their own work in response to class discussions and motion picture viewings, which focus on still photography and the roles of photographers in society. Students must have their own adjustable digital camera, a laptop computer, and Adobe CS3 for photo editing.


Then an architecture course, CAD Fundamentals. This is less exciting but I want to go from intermediate Rhino user to advanced Rhino user.

This introductory course investigates architectural drawing using digital design tools. Lectures and readings focus on digital drawing as a generative and representational device, while exercises and laboratory sessions help students achieve a basic competency with drawing and image manipulation software. Projective and translational drawing exercises are used as a means to explore fundamental concepts shared by many digital software interfaces. Emphasis is placed on exploiting the unique capabilities presented by digital design tools, while developing a critical understanding the inherent biases and limitations of any software.

I'm also taking a history course on the early years and formation of the Eastern Orthodox Christian church. I really enjoy history courses and am trying to learn more of the history behind my religion, beyond what you can find in the Bible.

So, here we go!

Thanks for reading!

Tuesday, December 15, 2009

Smart Surfaces Course Progression

I was just thinking about how much each project has progressed us as Smart Surfacers (it's a word now!). We started the semester with this, basically throwing sand around.


Then we progressed into heliotropism and easily tripled the complexity of our problems. We also made smartish objects. This could follow the sun (or a flashlight as it may be).

Our sun tracker.

After that we stayed at basically the same level and created a field of solar trackers that moved in unison.


Our solar tracker in action.

We then moved into a two week project and we created the light box, it was powered through solar panels and a side lit up when you walked by it. The idea was to create a field of them to walk through. This was the most frustrating two weeks I think I've ever had. (Team problems for a while)


Then of course, we moved on to the iWall (I still hate that name), which I'm really really proud of.


Basically, what I'm getting at is look how far we've come! From throwing sand to an aluminum and acrylic self adjusting passive lighting modular wall system. Not bad.

Thanks for reading.

Monday, December 14, 2009

It's Over and Done With

It's sort of bittersweet, but Smart Surfaces is, for all intents and purposes, over. It's sort of anti-climatic actually. A semesters of some of the hardest work I've ever done and then it's over. Maybe for me it's just what I feel after any big project but heightened since I missed the final presentation because of a death in my family. Talk about climactic in all the wrong ways.

Anyways, our project is

The iWall Modular Light-Filtration System

The wall you see here is a modular, scalable, self-adjusting multi-aperture window, designed to optimize light flow into a room by manipulating the position of rotating wood panels. You could call it an 'automatic venetian blind', as that is the gist of the purpose. The system consists of 30 individual modules, with one panel per module, which allow a variable amount of light to pass through. The structural elements are built modularly, but circuitry elements - such as wiring - are set up in a non-modular fashion. Individual module apertures open and close in reaction to the intensity of the light that passes through the wall as detected by light-dependent resistors (LDRs), seen on the projection side, holding a relatively constant light level on the ‘interior’ of the wall at all times - this gives 'heliotropic' and 'smart' characteristics to the wall - 'surface', fitting it into the premise of the SmartSurfaces course. The actual actuation is by a grid of servos powered externally and controlled through inputs from an Arduino Mega and the LDRs. The materials used in the assembly of the individual modules were 3/16" cast acrylic cut by laser and 3/16" 6061 aluminum sheet cut by water jet.

My group presenting our passive lighting system.


The back of the modular wall.


The view through a module to the light patterns created behind the wall.


Each module had it's own servo turning the panels. Each panel was veneered with a curly maple veneer on the back and a thin layer of white polystyrene on the front. The modules are held to each other by 4 bolts per unit.

I am so incredibly happy and proud with how our project turned out. It's one of my favorite pieces I've ever been a part of. It was an incredible amount of work, and an incredible amount of time, and quite a bit of money (Grants are awesome!), and something that I can't wait to show off in my portfolio.

I really enjoyed working with my team. Neil (Engineering) basically coded and figured out how to make the arduino do what we wanted it to do. Big props to Neil. Michael (Engineering) did a little of everything really and was a big help assembling, but single handedly tackled our big final paper and kept the team on budget. Breanna (Architecture) handled the renderings, worked on the CAD design and was part of the assembly team. Taylor (Design) was Mr. Building and worked on CAD design and single handedly made the panels. Josiah (Architecture) worked primarily on assembly and the build team and made a big contribution on the laser cutting and water jet cutting of the raw acrylic and aluminum. I (Design) spent my time water jet cutting the aluminum, laser cutting a small fortune in acrylic, and assembling modules.
I really feel like we had a dream team and I would work with any person in my group again in a heart beat. I'll honestly miss seeing them almost everyday. Perhaps before next semester starts up my group would like to meet for a beer at Ashley's Pub?

I'd also like to thank the professors that ran this course, John Marshall (Art & Design), Max Shtein (Materials Science Engineering) and Karl Daubman (Architecture) all did a hell of job. Even though we sometimes felt like guinea pigs as students, the course was a great one and one that defines the Michigan difference. This was an opportunity that would never have been available to me at any other art & design school. A heartfelt thanks to all the professors.

Thanks for reading.

Thursday, December 10, 2009

1 day 'till due. No pressure. It's only 3 grand.

Yep, it's all due tomorrow (Friday) for Smart Surfaces baby! A few photos from module building over the past two nights.

Josiah, Breana, and I working Tuesday night glueing modules.

A module without the light controlling panel in the middle.

The army of half modules, all glued up and waiting for the plywood panels.

Best of luck to my group tomorrow night and Friday, I'll be gone because of a death in the family. They are going to kick ass.

Thanks for reading!

Friday, December 4, 2009

Canvas Shoe Design

Ok, so this post has been a long time coming. I've just been to busy to post some projects from the beginning of the semester, but now have some time as I am sitting in front of a laser cutter for a few hours cutting out modules for Smart Surfaces.

Here we have the Canvas Shoes from early on in the semester in More w/ Less. I took the starting project that Jan gave us to create shoes out of paper that could support a persons weight and decided to develop my tubular paper shoes further with canvas. In this second phase of the project, we were specifically designing shoes for one of our class mates.

Enter Mallory.

I interviewed Mallory on her shoe preferences, foot size, likes/dislikes, and found a few main things she wanted in shoes,

-she enjoyed simple flats with a little experimentation to them
-organic, flowing, intertwined shoes drew her curiosity in
-a engaging sole print was a plus
-cooler color for the major color
-comfort

So with that in mind, I did a little research into where flexibility and, more importantly, where rigidity was needed for a correct human gate. I also read up on arch support and designing for comfort and impact resistance.

We would be critiqued on how comfortable the shoes were for the users, how long they lasted, and meeting the users overall needs and desires.

Mallory modeling my shoes for her.

I developed the rolled tube design of my paper shoes because of their incredible strength and the ability to add flexibility and rigidity where it was needed. When the short tubes were glued to the sole they naturally had flexibility against one another, but by simply strategically glueing tubes together, I could create rigid sections to provide support for Mallory's arches and give her a platform to push off of when walking.

I made the tubes out of a canvas often used in awnings and on boats called Sunbrella, I chose it because it was waterproof, highly fade resistant and just as importantly, soft to the touch. The sunbrella was cut into thin strips, rolled, and glued. I then attached each roll to the sole. The sole was made from a combination of layers of Sunbrella fabric and bristol board. The bristol board was used to keep the wearer from feeling the tubes through the fabric.

Assembly.


Rolled Sunbrella Tubes attached to the base of the sole.

The Sunbrella tubes had a nice tendency to compress under walking weight, which enabled me to provide the user (Mallory) with a nice level of comfort when walking.

The tubes that make up the outsole.

I used navy blue Sunbrella because Mallory liked cooler colors on her shoes, but threw in some yellow to appeal to Mallory's desire for a little flair and experimentation. For the color I used a handkerchief with a white and black paisley pattern printed on it and hand sewed it to the footbeds. I used this to add color to both the footbed and to the weave that made up the uppers. I specifically chose to weave the uppers because of Mallory's desire for flowing, interconnected footwear and because of the stretch and flexibility it would offer for Mallory's foot to stay in the footbed comfortably.

The yellow handkerchief sewn onto the footbed.


The weave that made up the uppers of the flats.

To provide arch support I added taller tubes to the sole under the foots arches. These were roughly 1/8th of an inch taller than the rest of the tubes and when the user stood or walked in the shoes, the taller tubes pushed the footbeds up and provide support for the arches. I felt that providing arch support through the soles instead of building up the footbeds was a more material efficient and more effective way of providing support when walking or standing.

Mallory, enjoying the early fall sun in her new flats.


Overall, Mallory was happy with the shoes I designed for her. I was able to provide her with everything she was looking for and was able to do it efficiently materials wise. The pair of shoes used only 2/3rds of a yard of Sunbrella and was still able to provide comfort, support and looks.

Thanks for reading.

Related Posts with Thumbnails